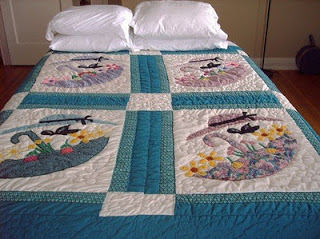
Quick and Easy Baby Shower Gift

If your life is anything like mine, you’re finding out every week about a friend or relative who is expecting an addition to their family. This cute baby tag blanket is perfect for the beginning sewer!
MATERIALS:
• ¾ yard quilting cotton
• 1 piece cotton batting – 20.5” x 20.5”
• grosgrain ribbon – various colors, totalling 18 feet
• coordinating thread
• straight pins
• washable marker or chalk
• sewing machine
• iron
• ¾ yard quilting cotton
• 1 piece cotton batting – 20.5” x 20.5”
• grosgrain ribbon – various colors, totalling 18 feet
• coordinating thread
• straight pins
• washable marker or chalk
• sewing machine
• iron
INSTRUCTIONS:
1. Cut batting into a 20.5” x 20.5” piece. A ruler, mat and rotary cutter aren’t at all necessary, but they do make things easier!

2. Cut two pieces from quilting cotton – each 20.5” x 20.5.” One will be the front of the blanket. The other will be the back of the blanket.
3. Using basting spray or pins, baste batting to the wrong side of the front fabric piece.
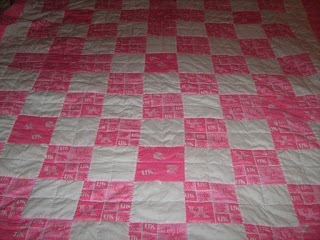
4. Mark quilting guide lines on the right side of the fabric you just pinned the batting to. This photo shows straight, diagonal lines. Feel free to be creative with your quilting. Mark lines so that there isn’t more than about two inches of open space between them. Be sure to fill the entire square.

5. Set your machine stitch length to a longer than normal one. I normally set my machine stitch length to 3.5, to give a nice wide quilting stitch. If your machine doesn’t have a variable stitch length, that’s okay, too! Work with what you have. Just take your time if you’re feeling uncertain!

6. Quilt, as desired, stitching along each of your marked quilting lines. It is best to start from the innermost lines and work your way out.

7. Admire your quilting!

9. Find the middle of one side of the quilted piece of fabric. Mark with a pin.

10. Fold each ribbon in half. Pin the first ribbon piece in the middle of the quilted piece of fabric so that cut edges are even with fabric edge and the folded end of the ribbon is toward the center of the fabric.

11. Repeat ribbon pinning every two inches. Each side should have nine ribbons pinned to it, working from the center to the corner.


12. Machine baste around outside of blanket, using a 1/4” seam allowance. For the very beginner, machine basting is just straight sewing but with a very long stitch. Your machine probably features a basting stitch.

14. Beginning at that opening, sew around the outside of all four sides of the blanket, using a 1/4” seam allowance. At each corner, stop stitching 1/4” from the end of that side. End with the needle in the down position. Lift the presser foot, pivot the blanket, lower the foot and continue sewing along the next side. Stop sewing on the other side of your turning opening. (I don’t recommend sewing over pins as that can damage your machine and be dangerous if a needle or pin is to break. Instead, sew right up to the pin, stop, then ease the pin out and continue sewing. With practice, this becomes an almost automatic movement.)


15. Turn blanket right side out through opening. Reach in and push out corners with your finger.

16. Press all edges. Turn the seam allowances in at the opening where you turned it inside out and pin.

17. Starting at the pinned opening, topstitch about 1/8” from the edge around the entire blanket. For you beginners, don’t be intimidated by the word “topstitch” or the fancy foot I have on my machine in the picture below. Sure, it’s nice to have that foot, but it’s not necessary. Topstitching should be done close to the edge of the fabric and be straight since all the stitching shows. So – choose a point on your presser foot to line up the outside of the fabric with. Go slowly and sew straight, keeping your fabric aligned with that point on your presser foot.

18. Press, and admire your handiwork!

I think this little blanket would look AWESOME in some Kentucky Blue and White. I also think it would look okay in your team’s favorite colors! Paired with a bib and/or cute onesie, you’ve got a baby gift that you can be proud of!
If you have any questions about this tutorial, please contact Lydia.Feel free to use this tutorial for your personal use, however, please remember that all images and text are copyrighted and that all rights are reserved.