
The 11 Non-Grocery Items I Never Pass Up at Trader Joe's
Great finds from everyone’s favorite grocery store.

Everybody knows that Trader Joe’s is the absolute BEST grocery store. If there’s a TJ’s in your town, then you find about a million reasons to go there. Their prices are insanely low. Their cheeses and seasonings and salad dressings are the best you’ll find anywhere. And the little coffee samples are just enough to keep you going as you shop. Today, I’m rounding up the top eleven non-grocery items I always buy at Trader Joe’s. These are some of my favorite deals on absolutely great items!
Fiddle Leaf Figs and Mini-Succulents

I LOVE those Instagram accounts by self-proclaimed plant ladies. My friends Anne and Mindy immediately spring to mind; they have gorgeous plants that always seem well-maintained. I don’t quite trust my own plant lady skills, so I tend to stick to inexpensive plants. The $1.99 mini-succulents at Trader Joe’s are, I’ve decided, my gateway to plant lady status. I’ve started picking up these tiny planters (like the teensy one in the above photo), repotting them, and basically leaving them alone in a sunny spot. I couldn’t resist picking up a couple of the Fiddle Leaf Fig plants at TJ’s as well; they require a little more work but are so gorgeous!
Kitchen Towels

These cotton kitchen towels legitimately might be my favorite Trader Joe’s find of all time. I have them in every color and use them for everything. They wash up so well and are so soft and handy. They don’t attract lint, so they’re fantastic for any household need.
Skin Care Products

Y’all. These are a game-changer. The antioxident serum provides my nightly retinol, the moisture boost serum plumps and brightens my skin in the morning, the eye cream moisturizes and decreases puffiness and the microdermabrasion scrub is fantastic for light exfoliation. But, the absolute star of the TJ’s skincare line is the gel moisturizer. My oily, sensitive skin is prone to breakouts and clogged pores. I’ve struggled to find a moisturizer that doesn’t cause as much damage as good. This product has transformed my skin. Oh, and each of these skincare products is priced under $10.
Ginger Grapefruit Sugar Scrub and Lavender Salt Scrub

These smell fantastic and leave your skin smooth and moisturized.
Peanut Butter Dog Treats and Chicken Jerky Sticks for Dogs

Harry and Sophie love these. We use the cookie-style peanut butter treats as a special reward for very good behavior, as they are pretty big. Sophie is one of those dogs who doesn’t hesitate to reject a dog treat that doesn’t meet her exacting standards, and she loves both of these!
Are y’all TJ’s fans? What do you never pass up?
How to Make a Needlepoint Belt, Part One
Step-by-Step guide to creating a needlepoint belt.
Over the past year or so, I’ve found myself really interested in needlepoint. It’s a hobby I’ve picked up time and again for well over 20 years, since my undergrad days at Transylvania. I absolutely love making needlepoint belts. They're such a fun project to undertake, and they make incredible gifts!
Over on Instagram, I’ve posted some photos of belts I’ve made or works in progress, and have had a lot of questions about how to get started. Today, I’ve teamed up with NeedlePaint, a custom needlepoint company, to give you a step-by-step guide!
Step 1: Determine your project!
Are you making a belt, dog collar, key chain, or sunglass strap? These questions weigh heavily into how much time and money you’ll spend on the project. It might be best to start with something small like a dog collar, or a pattern that doesn’t involve a lot of tiny detail. You’ll probably find that you get the hang of it in a hurry and are ready to move on to a more complex project fairly quickly!
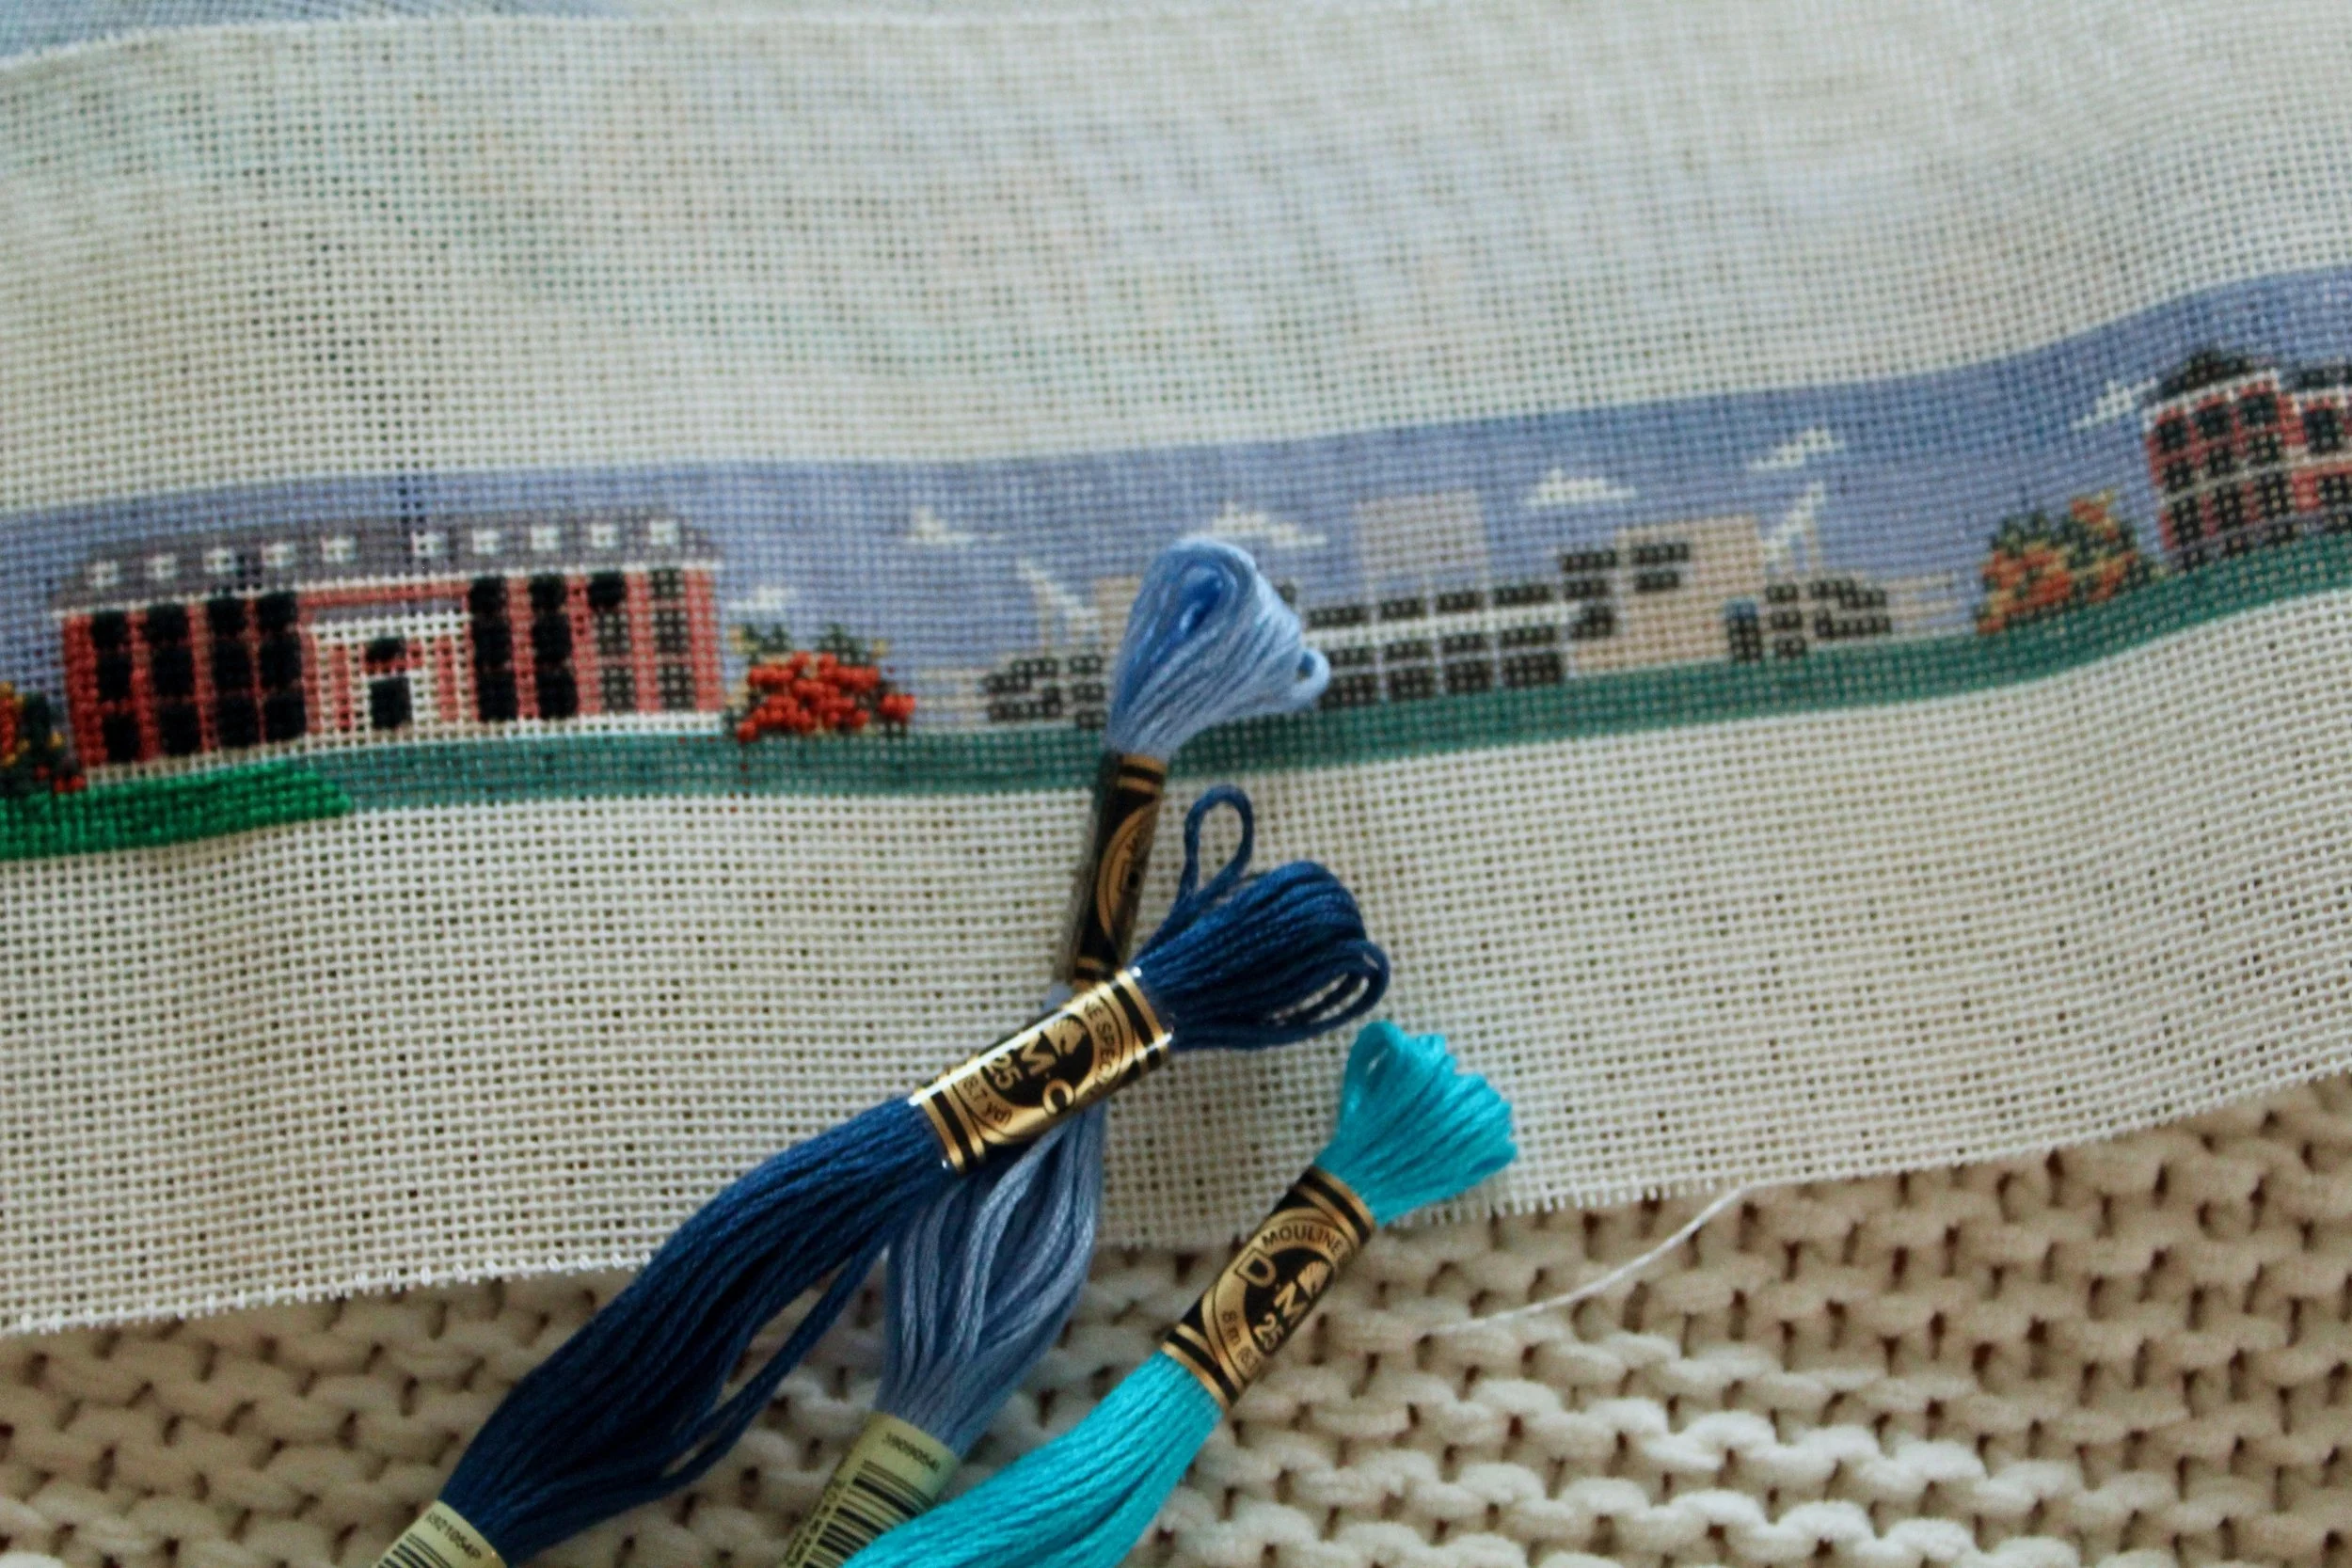
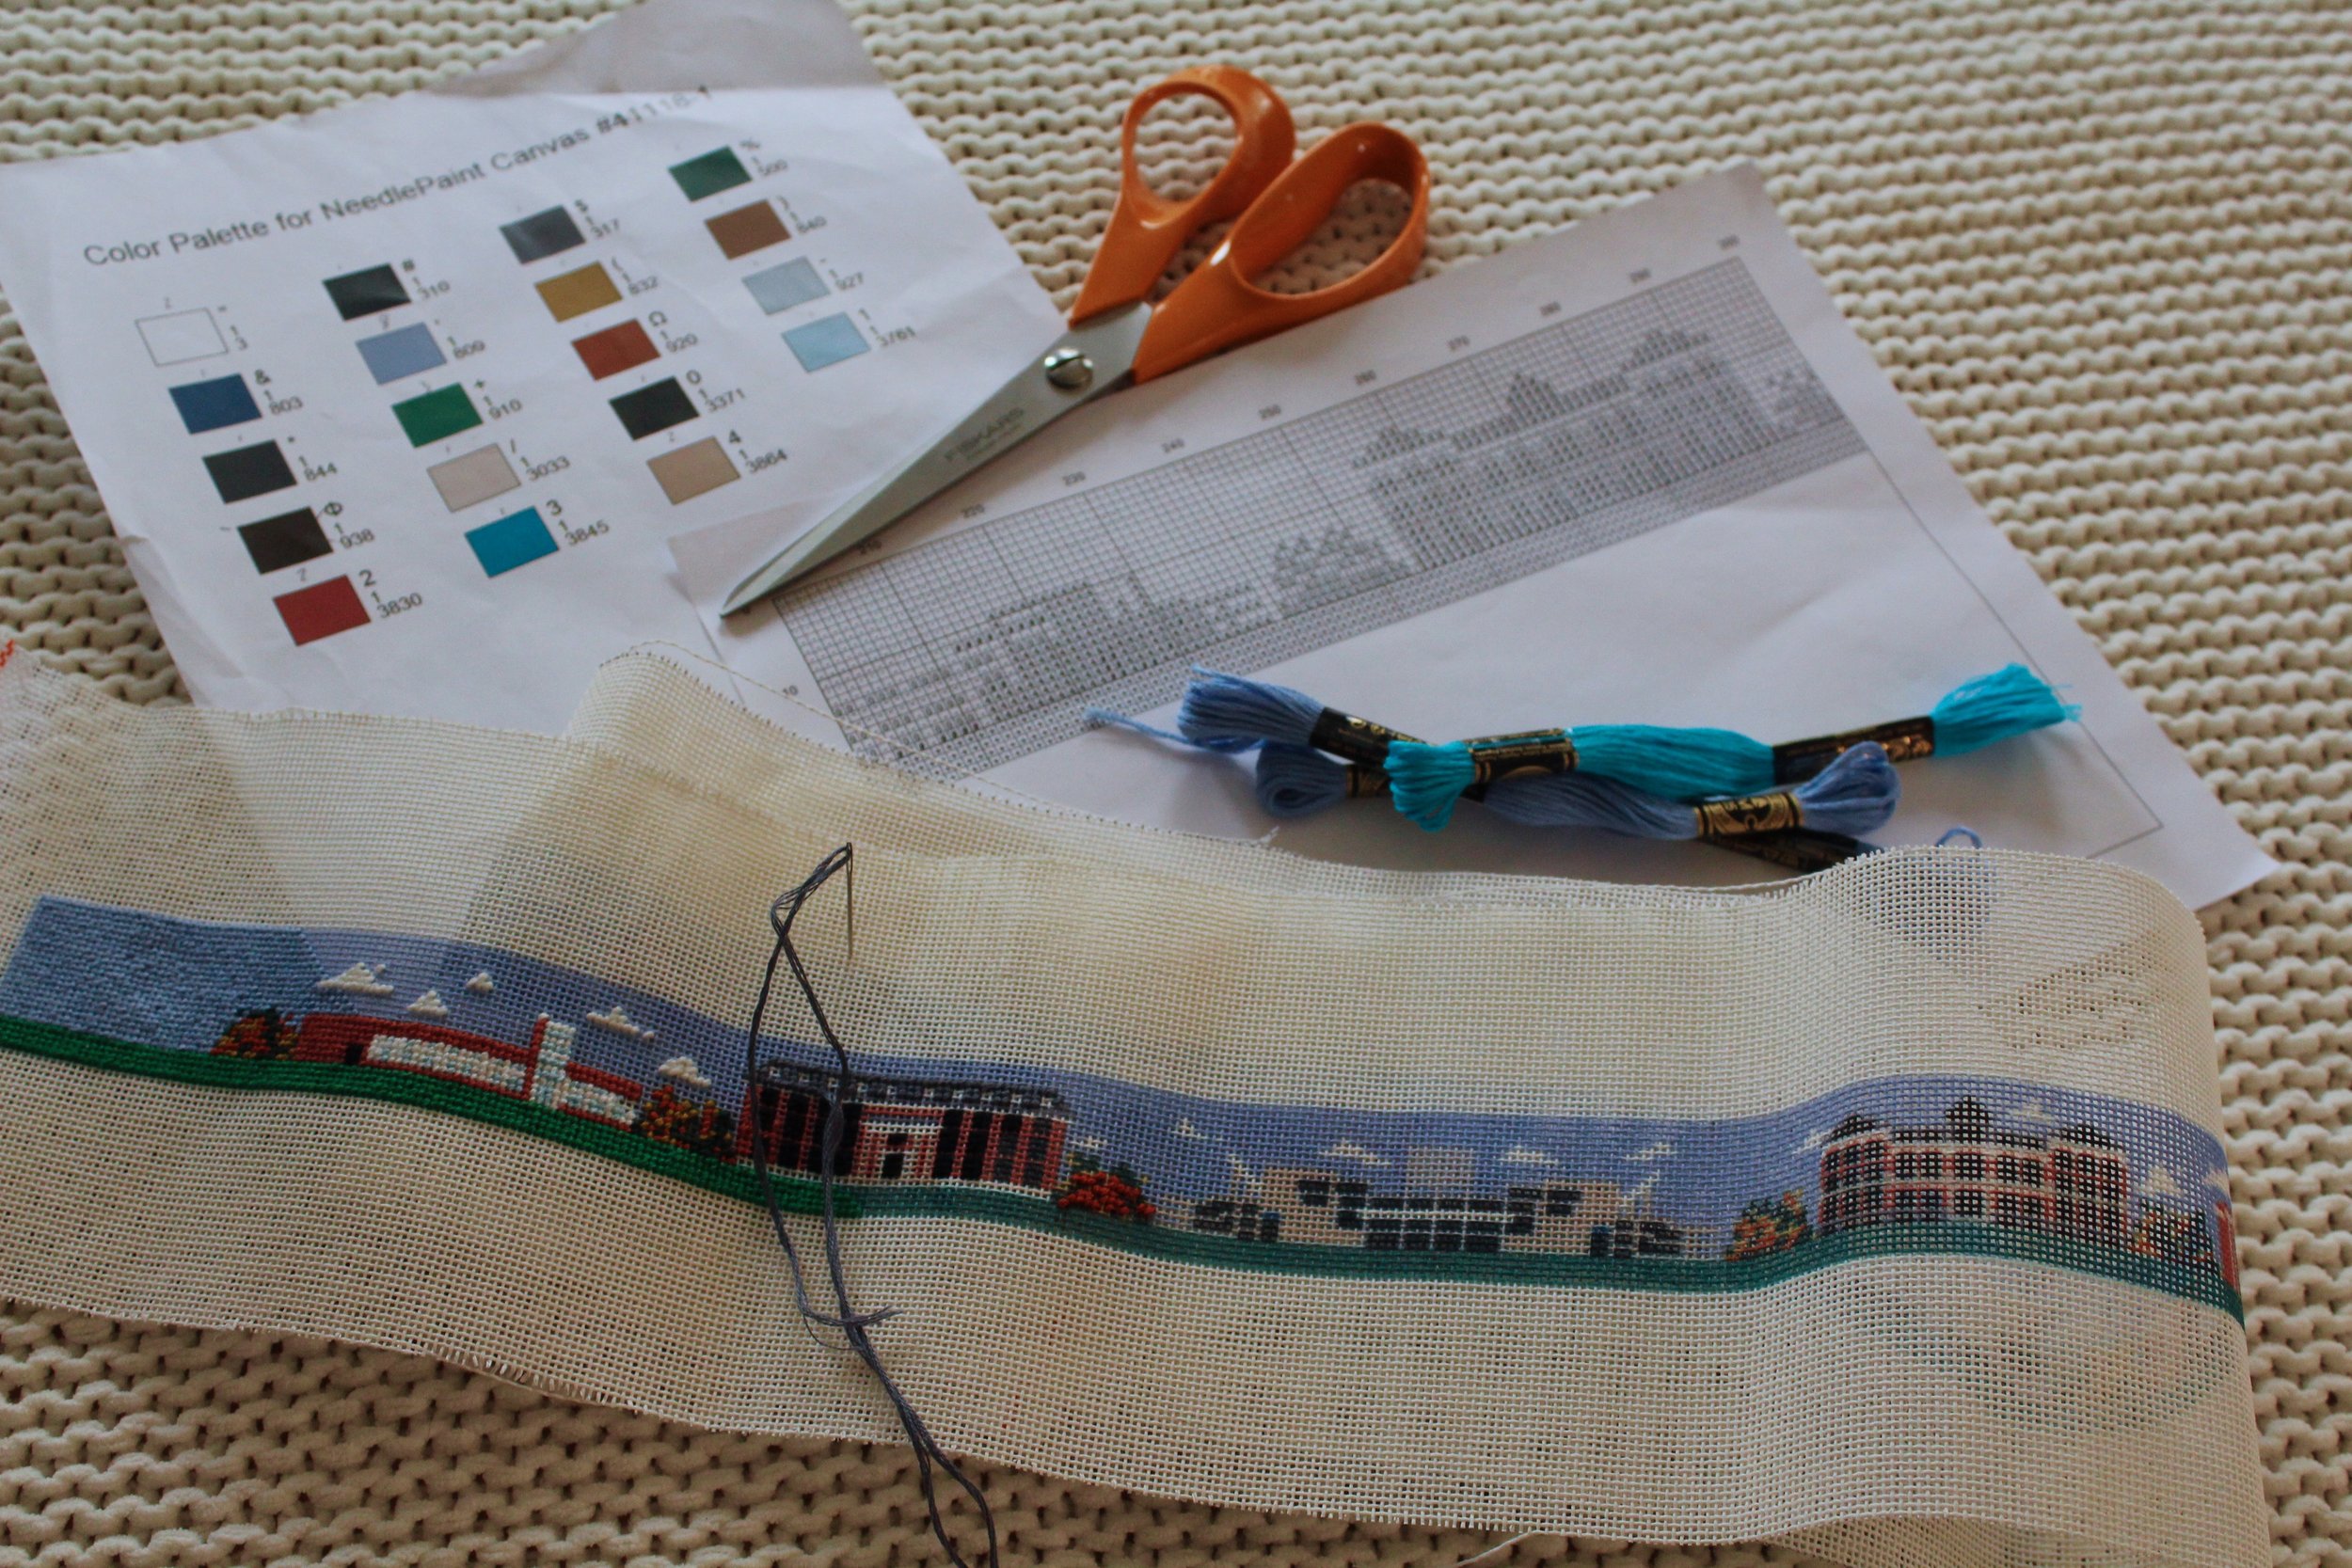
What materials are used in your belt kit? I can’t stress this enough. If it’s your first belt, then you’ll want to purchase a kit that has all of your materials together! As a general rule, the folks who sell the canvas are going to be better at selecting the appropriate threads and needles than you are. Let them kit your thread so that you have the correct colors, and the appropriate thread and needle sizes. Here are a few things you’ll need to know about the materials:
The canvas comes pre-painted on a mesh canvas. Mesh is graded into different sizes. The number on the mesh is determined by the number of holes per inch. So, an 18 mesh canvas has more holes per inch than a 14 mesh or a 12 mesh. This, in turn, determines the type of thread you’ll use. You may use DMC brand thread in Pearl Cotton sizes 3, 5, or embroidery floss size 25. These threads are also denoted by a color number. It’s a lot to learn, and it’s way easier to let the professionals choose the threads for you. If you have an option to choose the mesh (Needlepaint has a great blog about this here!), you should consider that a very small canvas (i.e., an 18 mesh) is going to take a longer time to complete and may be more difficult for someone who is very far-sighted or has a history of tendonitis or carpal tunnel in their dominant wrist. (I learned the hard way that I need to wear a wrist brace if I’m going to do a lot of needlepointing!) Don't be shy about asking your needlepoint shop for specific details. You can contact NeedlePaint here to ask more questions about your project, and you can rest assured that their products have a 100% satisfaction guarantee!
Step 2: Choose Your Pattern!
This is the fun part! You’ll want to pick out a pattern that really speaks to your recipient’s personality. This is a keepsake, so you probably want to go with an interest or hobby that is important to the person who’ll be wearing the belt. Some folks love to go with the customized hobby/ memory belt that commemorates several of the wearer’s hobbies; I’ve made one like that for my dad.
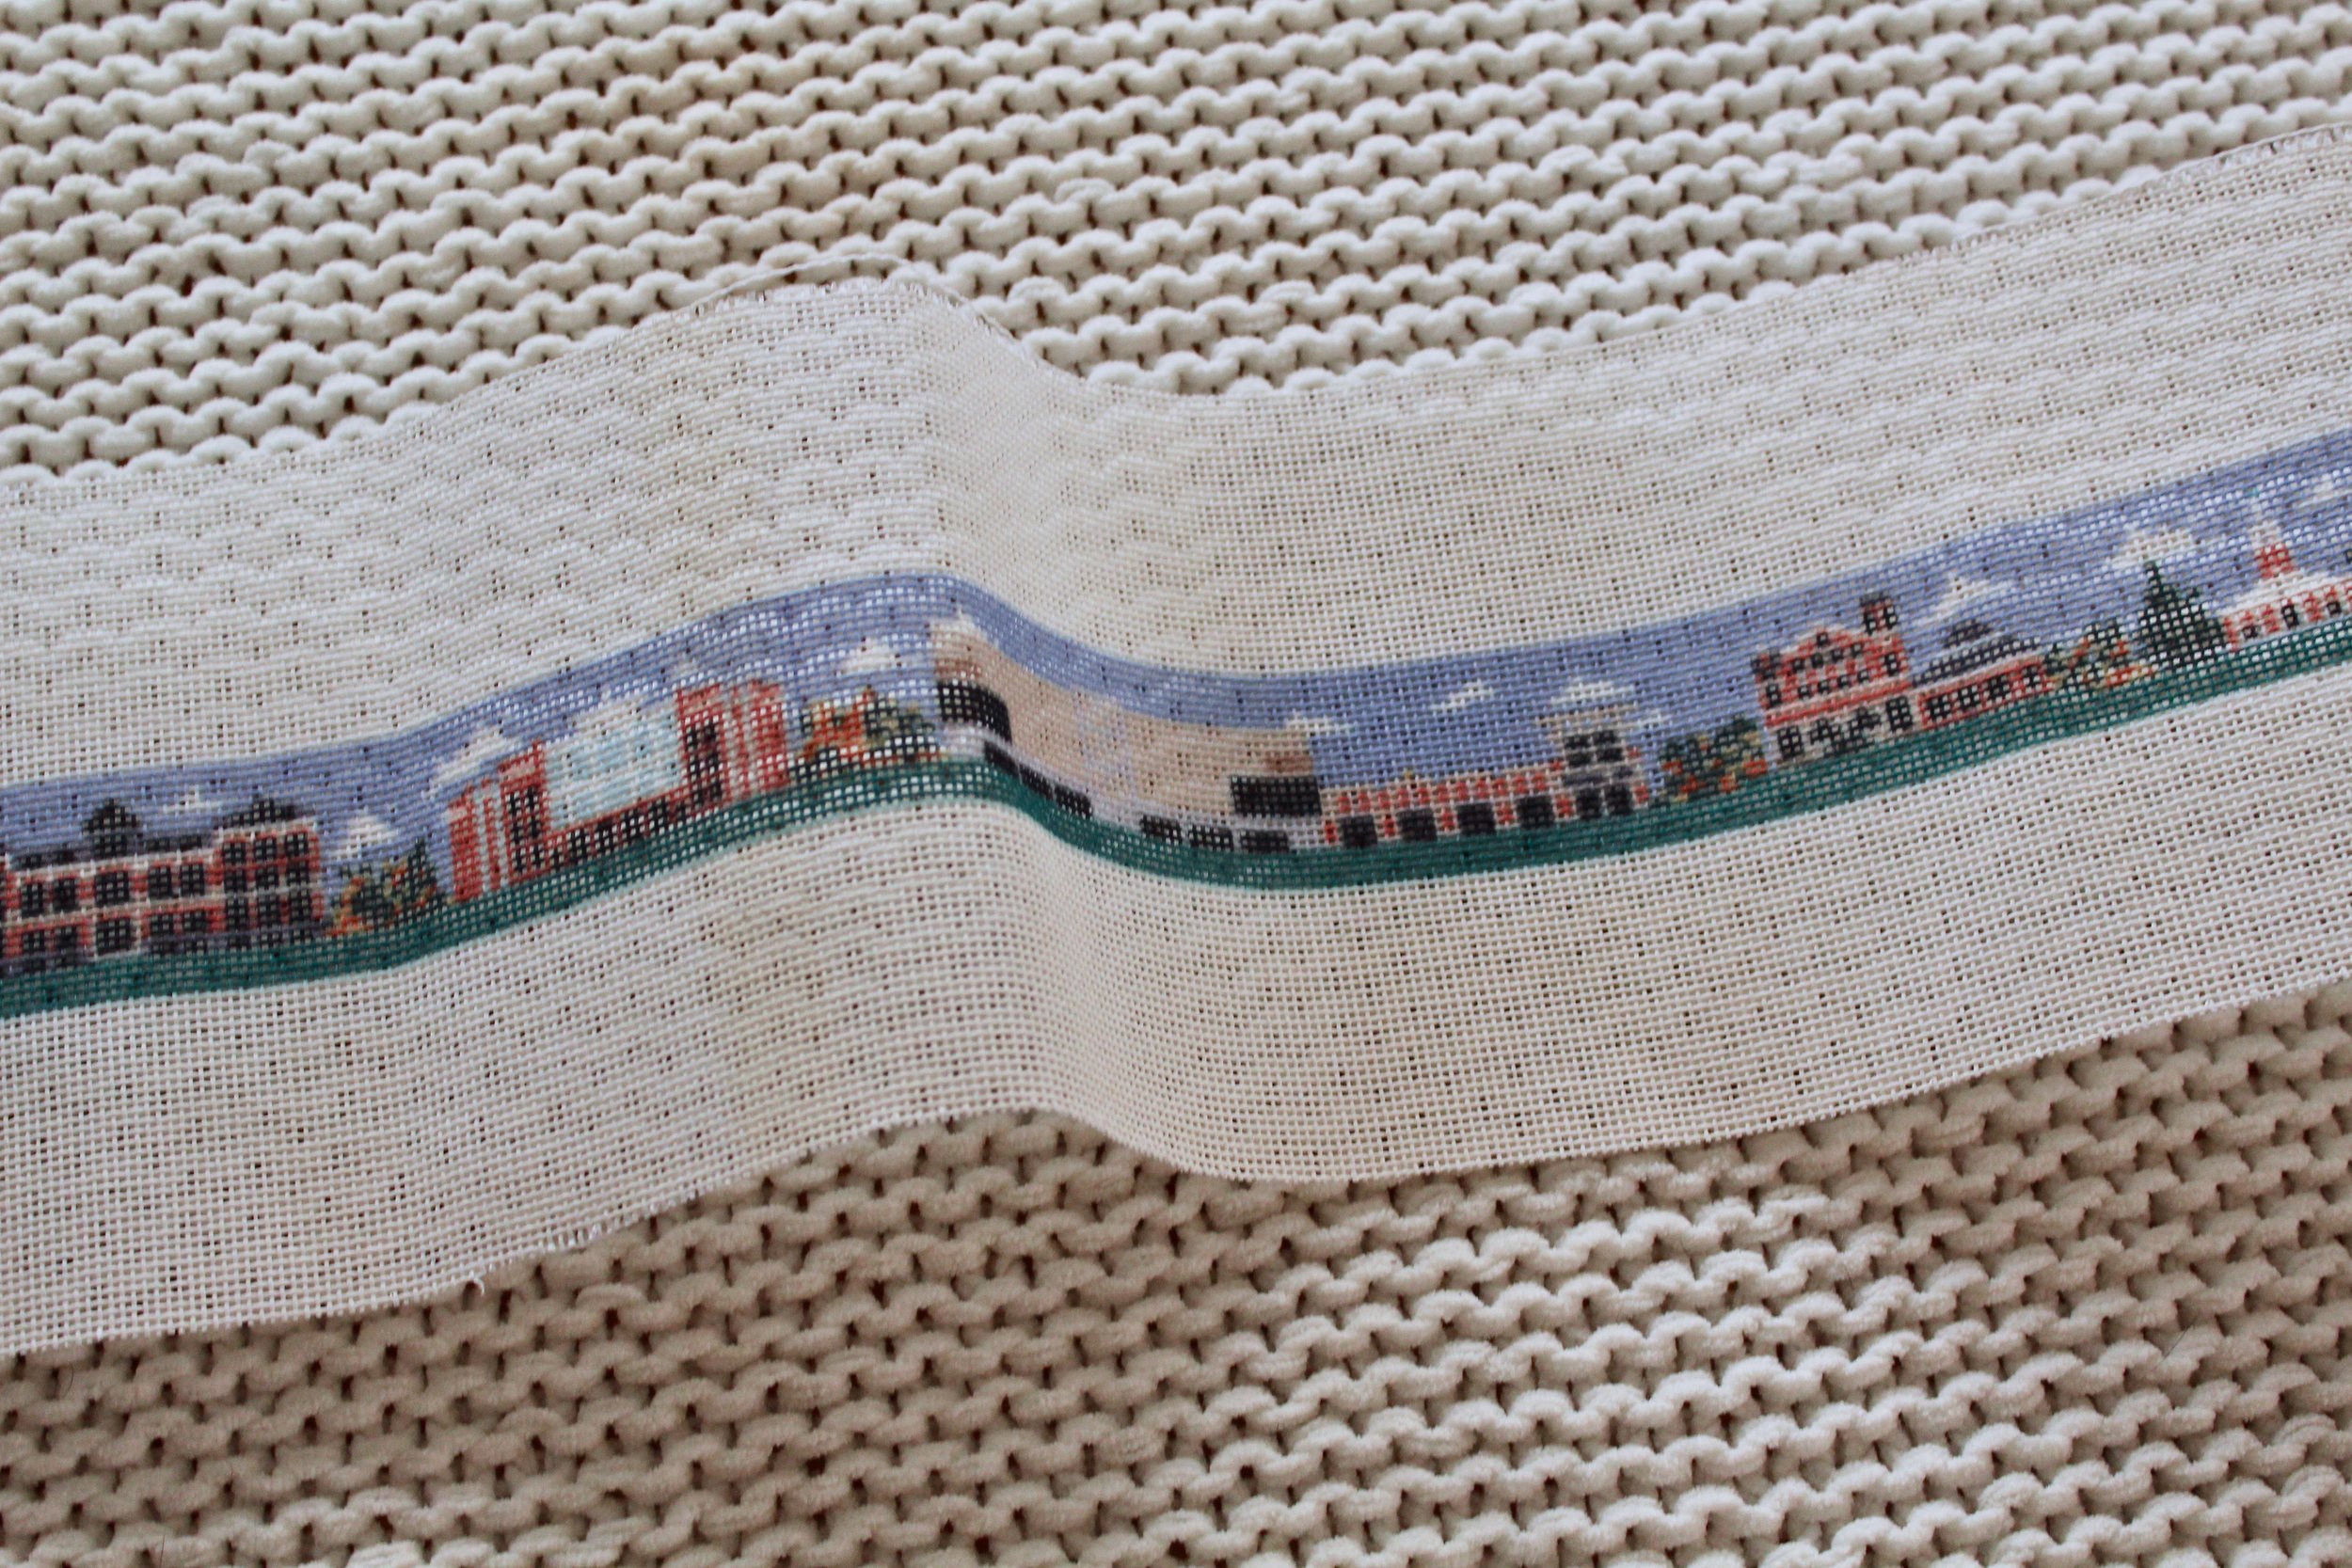
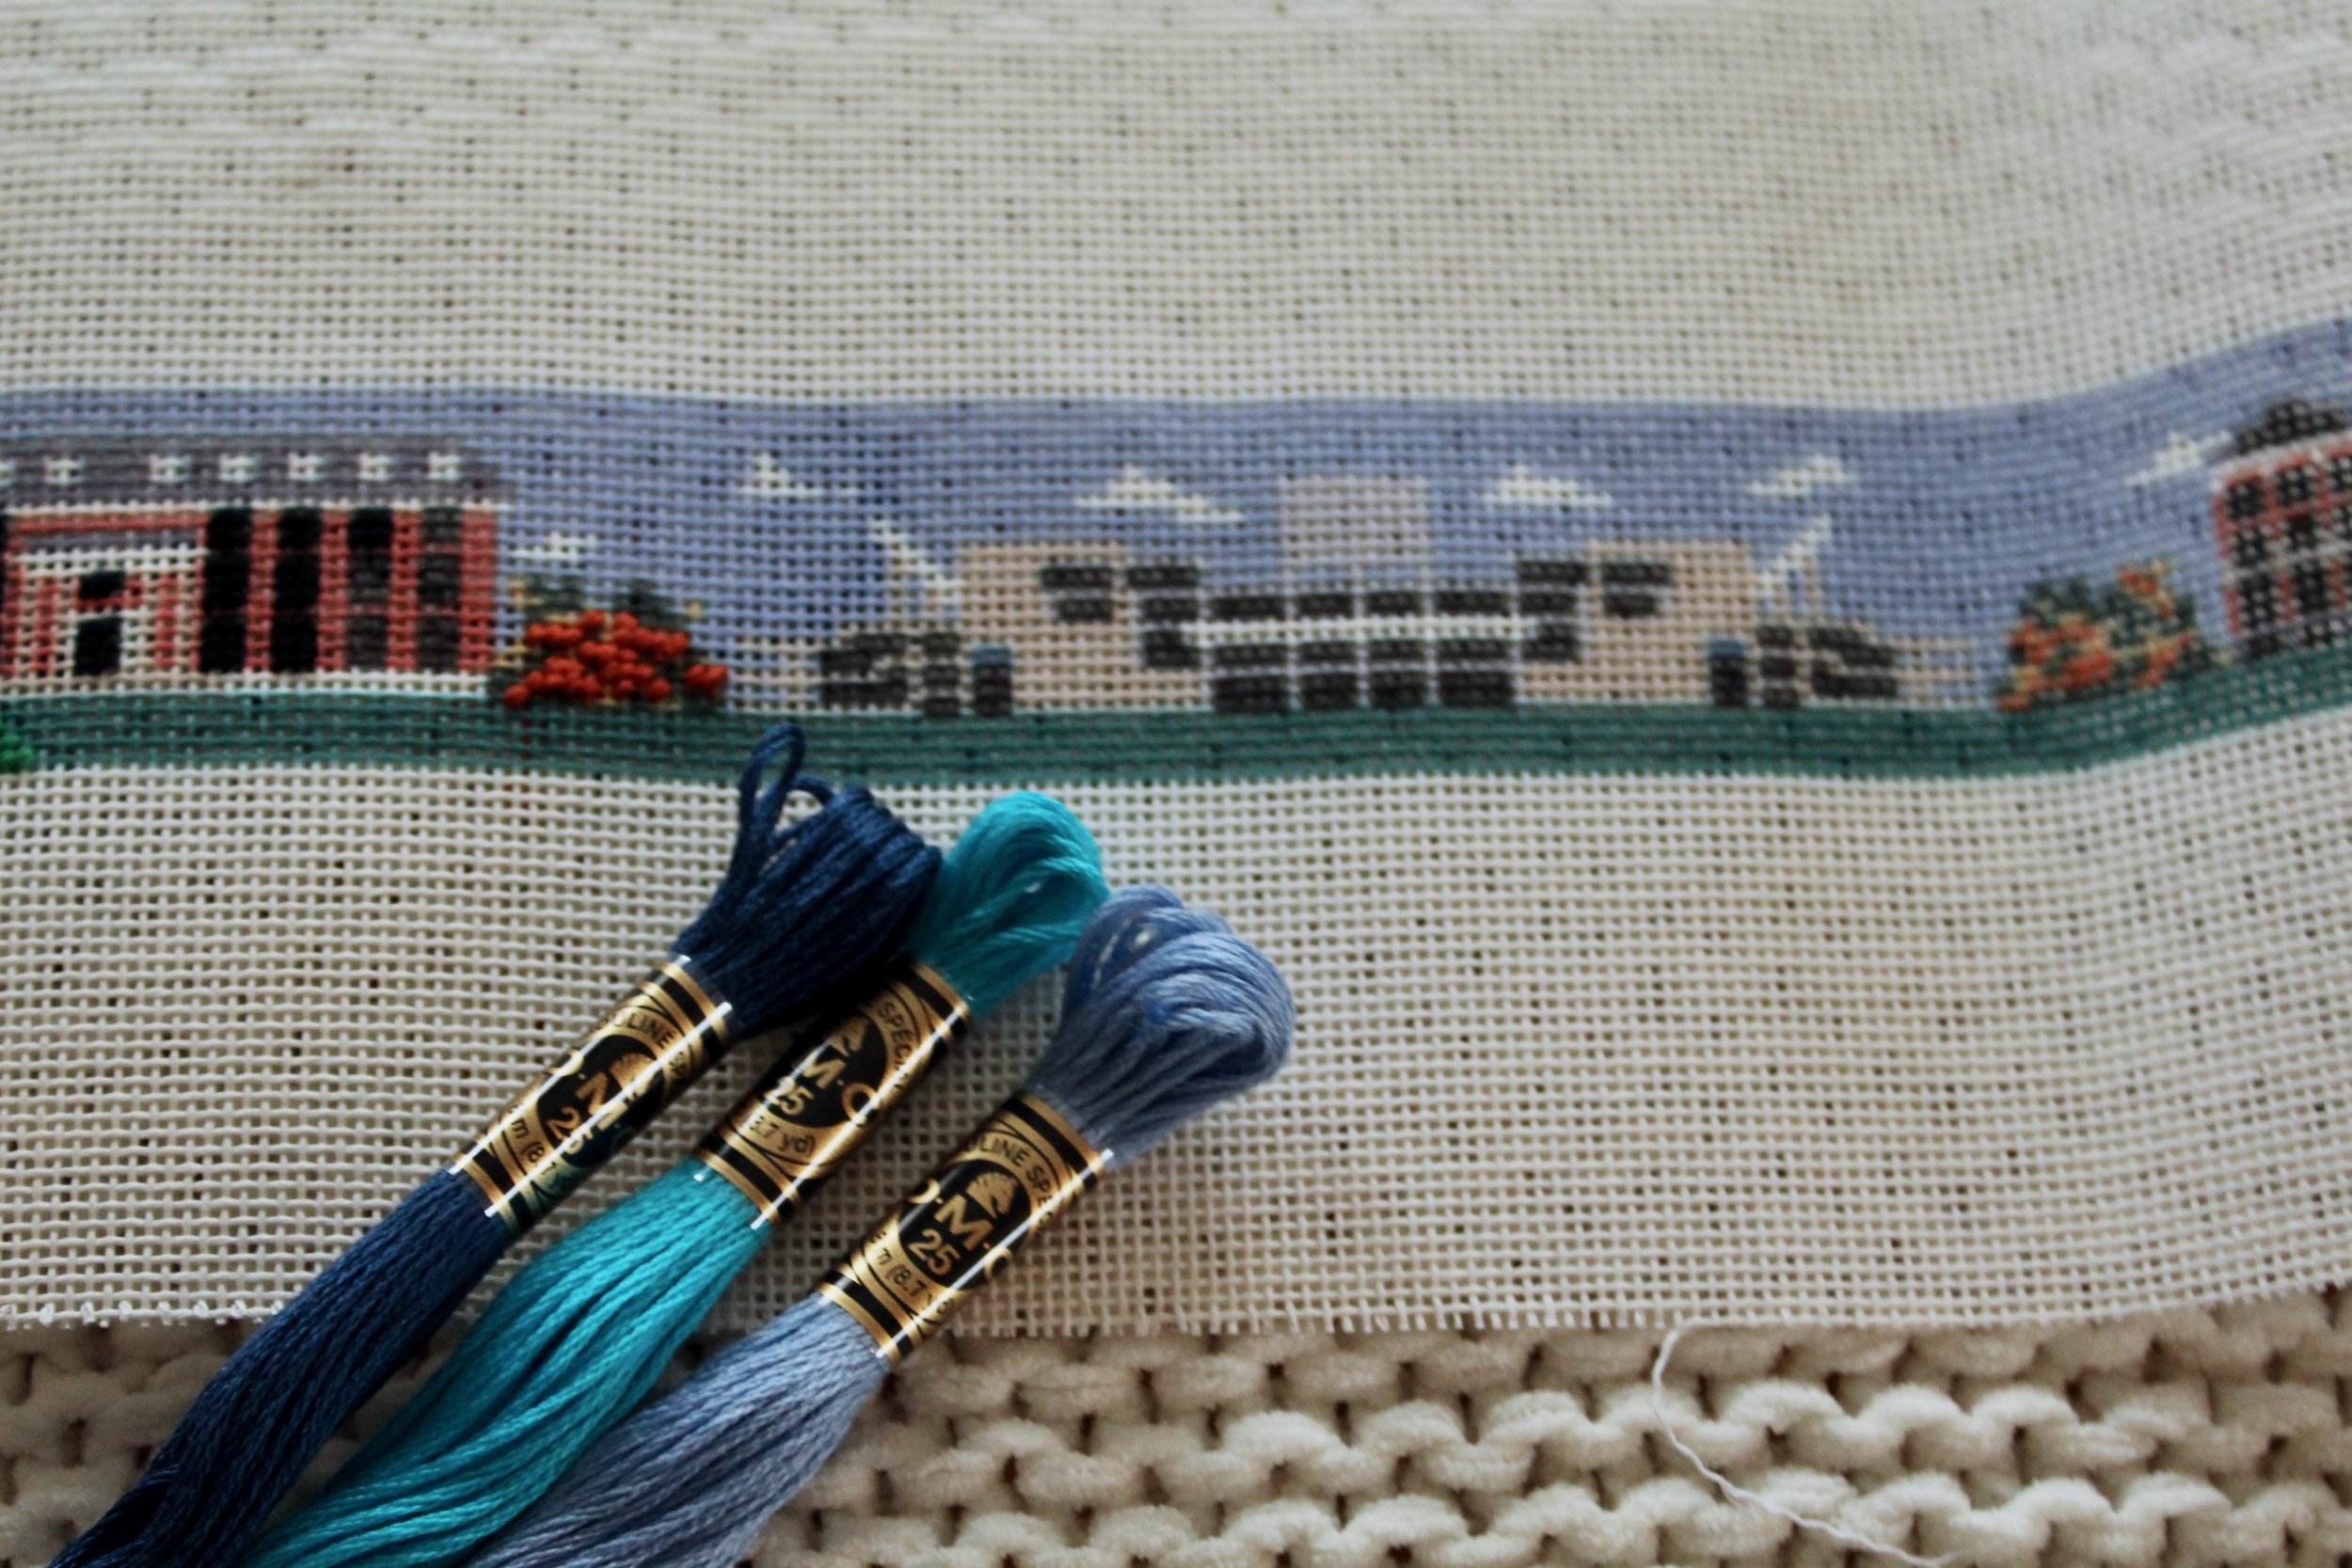
As for this project, I’ve made UK logo belts for Bob in the past, as well as a Bourbon Trail theme. This time, I went with a lovely, intricate pattern that depicts UK’s campus. Since both Bob’s law degree and his MBA are from the University of Kentucky, it seemed like both a fun commemoration and a clever way to show team spirit. I love that they combined images of older buildings like Bowman Hall and Memorial Hall with the sports stadiums — both Rupp Arena and Kroger Field! — as well as newer buildings like the WT Young Library and landmarks like the Arboretum. It really is a great design for someone who loves UK’s campus!
Now that you and your needlepoint store are on the same page about everything — the pattern, the colors, the initials, etc., there’s just one more thing to do before checkout: Measure Again!!! You’ll want to make sure you’re working with the vendor to ensure a properly fitting belt. NeedlePaint does a great job explaining their sizing system here.
Step 3: Start Stitching!
You basically are just going to do a single, diagonal stitch in correspondence with the painted design on your belt canvas. The only stitch you have to know is the continental stitch (This guide from DMC explains it way better than I ever could!), but I often add in a basketweave for stability. You can find a lot of great information on the internet, and the NeedlePaint blog has a wealth of information. I love that my NeedlePaint canvas not only has the design painted on the canvas, but also includes a full pattern that lets you know which color of thread to use on every single hole. As you can imagine, the UK campus belt utilizes several shades of blue. The pattern guarantees that I select the right thread for every stitch!!
I’ll post Part Two, How to Finish and Leather Your Belt, soon! Thanks so much to NeedlePaint for partnering with me on this project!
Let me know in the comments if you’ve ever made a needlepoint belt!
How to Taste Bourbon Like a Pro
Step-by-step guide to tasting Kentucky bourbon

Kentucky bourbon is bigger than ever. Of course, 95% of the world’s bourbon is made here in the Commonwealth, as is 100% of the bourbon that’s worth talking about. It’s an $8.6 billion dollar industry that generates over 20,000 jobs for Kentuckians. Bourbon impacts every Kentuckian. But, no matter how hot the industry is, I’ve noticed that there are plenty of Kentuckians who are still a little scared to drink bourbon. It’s a question I get fairly often from blog readers and social media followers: How do I get started with tasting bourbon?

As a bourbon writer, I’ve had the incredible opportunity to attend tastings led by some of the most interesting names in bourbon. I’ve watched the legendary Fred Noe of Jim Beam demonstrate his “Kentucky Chew” technique, participated in an intensive sensory tasting session led by Elizabeth McCall and Chris Morris of Woodford Reserve, the masters of (click here for information on how you can attend Woodford Reserve Tasting Academy, which I promise you’ll want to attend!), and been among the very first media members to sample the most recent Angel’s Envy offerings. I’ve picked up a few tasting tips along the way, and I want to share them with y’all.
Setup:
Now, it’s great if you have the opportunity to go to a tasting led by a professional. If you’re in Louisville, there are great classes at Westport Whiskey and Wine. Lexington and Louisville both have fantastic classes at Total Wine and More. And, of course, there are tasting opportunities on all of the distillery tours. But, it’s also pretty cool to setup a tasting at home, so you can learn about your own palate as well as your friends’ and family’s.

Step 1: Select your Whiskey.
If you’re going to have a whiskey tasting, you’ll want to select a whiskey. Now, many Kentucky distilleries produce a bourbon and a rye. These are both types of whiskey, and can be produced using the same equipment. Absolutely NOTHING marks you as an amateur quicker than calling a rye whiskey a “bourbon.” If you take one thing away from this blog post, please remember that. The main difference is the grain content. Bourbon whiskey must have a recipe, known as a mash bill, of 51% corn or higher, while the mash bill of rye is at least 51% rye. I find that, when selecting whiskeys to taste, it’s good to pick a theme. I often go by distiller. When sampling the new Old Forester Rye, I tried it against the Old Forester Signature Bourbon, as well as the Woodford Reserve Rye, as these were all produced under the supervision of the same Master Distiller, Chris Morris, under the two major Brown-Forman labels. Another easy starting point would be to try Maker’s Mark with Maker’s 46 or Woodford Reserve with Woodford Reserve Double Oaked. These comparisons will show you how the very same bourbon develops a different taste when finished in different barrels. You can also choose a flight consisting of one from different categories — wheated, high-rye bourbon, rye, etc. — to really see the differentiations. There is a great guide to hosting a tasting on the Kentucky Distillers Association website, and all of the major brands have really good information on their websites to help you learn about what you’ll be tasting before you buy.

Step 2: Set it up.
There really is no tasting glass like the glencairn for tasting. The tulip-shaped glass helps you experience the aroma of the bourbon as it’s supposed to be. If you don’t want to invest in tasting glasses just yet, you can use rocks glasses. Set up each tasting station in the same order, pouring about an ounce of whiskey into each glass. We’re not here to take shots or get drunk. The idea is to have enough juice in each glass to get an idea of how it tastes. Set your samples out in ascending proof order, so that a higher proof won’t overwhelm the flavors of a lower-alcohol spirit.

Step 3: Accoutrements
Turns out, you actually do need a few more things on hand for a bourbon tasting than just bourbon and glasses. Who knew, right?!?! You’ll need some good quality, flavor-neutral water. Here in Louisville, the best thing is actually our award-winning tap water, but to paraphrase Ina Garten, bottled water is fine. The water serves both as a palate cleanser and, if needed, for a drop or two to dilute the spirits. Sometimes, after the initial taste of the whiskey, it’s nice to add a little water (no more than a drop or two) to cut the proof and really dig into the flavor.
You’ll also want some crackers, bread, or popcorn to serve as a palate cleanser while tasting. And, although we’re limiting the amount of alcohol that’s being consumed in the tasting, you’ll want to have some appetizers or snacks on hand to offset the intoxicating effect. It’s also interesting to try some different food samples with your whiskey tasting to coax different flavors out of the drink. The Woodford Reserve flavor wheel tasting calls for aged parmesan, toasted hazelnut, dried cranberry, an orange slice, dark chocolate, and sorghum. I often make some substitutions when playing around with food pairings: I like Kerrygold Dubliner cheese rather than parmesan, and often use fresh or dried cherries and toasted pecans — these are just my taste preferences, and serve a similar purpose in drawing different notes out of any whiskey, not just the Woodford expressions.

Tasting
So here’s the thing. You honestly already have the only tools you need for a bourbon tasting: your own taste buds and curiosity. The most important thing here is taking the time to really be in touch with the sensory experience. Don’t let yourself fall into the trap of liking what you’ve heard is good, what “the experts” like, or what the people around you say is good. You know what you enjoy. You know if you like Brussels sprouts or red meat or chocolate cake, right? Well, bourbon is no different. Different people have different palates and enjoy different spirits. At the heart of it, that’s how the bourbon industry came to be.

Step 1: Color
The first thing you’ll notice when approaching your bourbon samples for tasting will be the color. The color actually does play a huge role in the tasting experience. The shade of amber of a particular whiskey will often be determined by its proof, age, and degree of barrel char. The above photo is a great illustration of how color predicts the character of a bourbon. Two Coopers’ Craft expressions were made from the exact same mash bill. The original Coopers’ Craft is an 82.2 proof, aged in charred barrels, while the Coopers’ Craft Barrel Reserve is 100 proof and has been aged in a specially chiseled barrel. Both of these factors impact the color of the bourbon, and give you the first clues about how it will taste. Predictably, the sample on the right, the 100 proof, has a far bigger and more complex flavor.

Step 2: Aroma
Your sense of smell has a huge impact on any food or drink that you taste. To get a full sense of a bourbon’s flavor, you should take the time to give it a good sniff before you taste it. Now, to the beginner, the first notes you’ll smell in any bourbon whiskey will probably be vanilla and caramel. These are characteristics of all bourbon whiskeys; they are the result of aging the spirit in charred oak barrels. Sometimes these notes linger beyond your first whiff, and they’re still pretty wonderful. As you smell the spirit, you’ll probably pick up on some other notes, too. These are the result of the specific yeast strains, grain varietals, barrel chars, maturation techniques, and everything else that goes into making a specific whiskey. Pay attention to what you smell. There are no wrong answers. I find that most of the Brown-Forman brands have a really strong pear note. Maker’s Mark expressions smell like creme brûlée. Explore the aroma for yourself and note how smells you enjoy play into flavors you like. If a whiskey has a strong raisin note and you hate raisins, then you’re probably not going to enjoy that spirit. Also, it’s very interesting to see how different conditions — a hot or cold day, how you’re feeling, etc. — play into the aroma you experience for a whiskey. It’s very common to smell something different in the same whiskey on a different day, even for folks who have a highly trained and developed palate.

Step 3: Taste
We’ve spent a lot of time getting to this point, haven’t we. Especially since the goal was supposed to be tasting a whiskey. Well, here we are.
Take a sip. See how it tastes on different parts of your tongue. Really think about the flavors you’re pulling out of the whiskey. Pay attention to your initial, emotional responses. Maker’s Mark always tastes like Christmas to me, both because of its elegant caramel and vanilla notes, but also because of the sensory memory of my great-aunt’s bourbon balls, which she always made with Maker’s Mark. You may sense a nutty flavor or a fruity note; subsequent sips or dilution with water will probably help you figure out what kind of nut or fruit. . If you’re tasting with other folks, you may hear them talk about notes that you absolutely do not taste; this is absolutely normal. There are usually some big notes that everyone experiences, and then other flavors that are way more about the bourbon’s impact on the individual. Some of the most experienced Master Distillers and Master Tasters and bourbon pros I’ve ever met will tell you the same thing: There is no right or wrong way to taste, and everyone picks up on a little something different. Trust your palate and your experience more than reviews, price point, or prestige. I promise this will make you a happier bourbon drinker.

Step 4: Finish
Think about the flavor the whiskey leaves in your mouth after you swallow (or spit) it. Maybe there’s a cinnamon note, or citrus fruit. It’s the final impression of the whiskey, and it often is a little more complex than the first taste.

Step 5: Record it
So, this is totally optional, but I find that the best way to develop my taste in bourbon is to keep a tasting notebook. I use this one, which is popular among the bullet journal crowd. I find that keeping my notes organized helps me to really compare flavors and experiences. I can look back on what I tasted in a specific whiskey and see if I taste the same notes again. It’s a great way to help me recall what I’ve tasted and what flavors I’ve tasted. If you’re interested in taking up bourbon tasting as a semi-serious hobby, I recommend journaling it.
Cheers, y’all! Let me know in the comments if you’ve ever done a bourbon tasting at home or at a distillery!!