
JV Clothiers Giveaway!
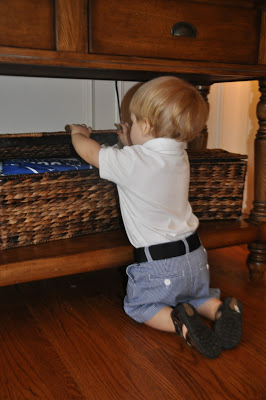
Calling all parents of boys! Every time I see a children's clothing store, I sigh a little as I look at all the adorable girls' clothing, and then I trudge on over to Dick's Sporting Goods to buy more Under Armour for my boys. Sound familiar? Well, the fine folks at JV Clothiers have caught on and are creating some truly fine apparel for our boys to sport on game day (or any other day, as demonstrated below)! They make fantastic polo shirts, shorts, and belts, and they were kind enough to send some to Will. He looks a little extra cute in these, I think. Here's a peek into our morning:
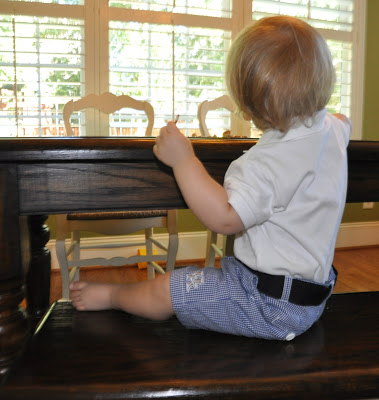 |
| Well, it isn't exactly breakfast at Ramsey's, but... |
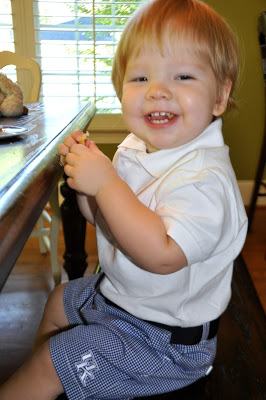 |
| ...OH! Hi there, Mom! How are you doing? No, no. I said, "These clothes make me look so fancy." |
 |
| Stylin', profilin', and repping the Cats in ACC Country |
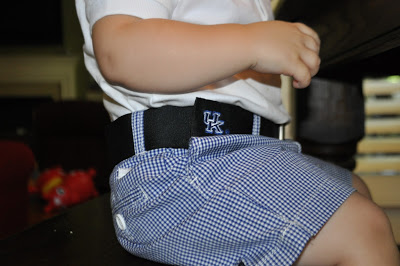 |
| Check out the little details that make these clothes so perfect! |
 |
| Time to break out the UK flag, Mom! |
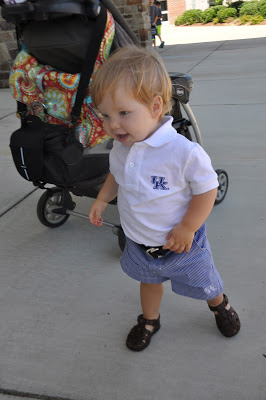 |
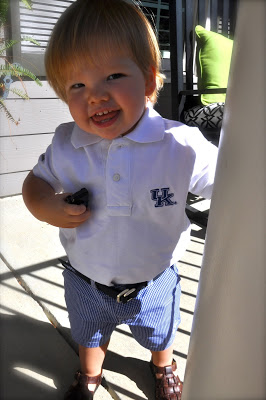
| Too big for the stroller. Gotta go greet my fans! |
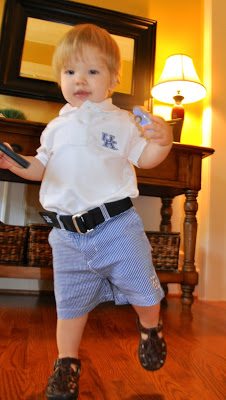 |
| Time to intimidate all opponents with my impeccable style. |
Did you know that...
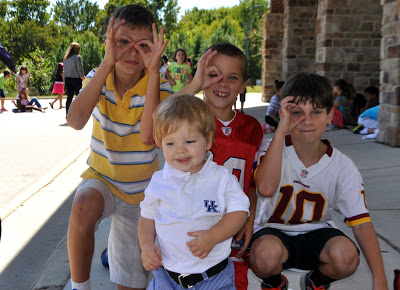 |
| ...seeing your gear will have your friends making 3 goggles? |
Or that...
 |
| ...every girl's crazy about a sharp dressed (pint-sized) man? Will had an exciting day decked out in his JV Clothiers duds! I am pleased to report that the quality of these clothes will not disappoint, as each piece held up to Will the Busy Boy's climbing, rolling, and dirt tests. I love knowing that I can dress my kids in such adorable UK clothes and will certainly be placing a matching order for Will's older brothers! SEC fans, you will definitely want to check out our drawing. And what luck for all my local friends who love UNC or NC State, as you will find your teams on the roster also. Want to win some JV Clothiers gear for one of your own boys? Enter our giveaway below. Good luck! |
Birthday Party Attire!
HerKentucky is turning two! So I styled the perfect party outfit for you! A few years ago, I famously told the Vice President of Merchandising for Victoria's Secret's accessories that "I always dress like I am going to a party, because you never know when you will be invited to one!" Our V.P. enjoyed the comment very much and said that it was sound advice. I think that birthday parties are special, so your outfit should be special. We are not trying to over shine the birthday celebrant, but your ensemble should say party!

This birthday party is all about Kentucky and cobalt or UK blue, as I like to call it, is everywhere this season. Just add a black blazer and some black caged heels and you are ready to party! You can pick up this adorable dress here.

I always look for pieces that can go the distance. This blazer is party perfect, but will also take you from football tailgating to March Madness. You can grab your go-to blazer here.

You can wear these heels with everything this fall. Add black opaque tights when Kentucky turns into a winter wonderland. You can get these pretty pumps here.
For a more casual option, grab your dark skinny jeans, add this adorable ruffle shirt in UK blue and top it with your new favorite blazer. Add the pumps or flats of your choice and don't forget your party hat!

If you are feeling bold, you can replace your dark skinnies with leopard denim leggings. Meow! Add a pair of high heeled boots or pointed toe pumps and you are ready to celebrate! Pick up your fancy fall leggings here.

What do you wear to a birthday party? Do you dress up or are you more casual?
This birthday party is all about Kentucky and cobalt or UK blue, as I like to call it, is everywhere this season. Just add a black blazer and some black caged heels and you are ready to party! You can pick up this adorable dress here.
I always look for pieces that can go the distance. This blazer is party perfect, but will also take you from football tailgating to March Madness. You can grab your go-to blazer here.
You can wear these heels with everything this fall. Add black opaque tights when Kentucky turns into a winter wonderland. You can get these pretty pumps here.
For a more casual option, grab your dark skinny jeans, add this adorable ruffle shirt in UK blue and top it with your new favorite blazer. Add the pumps or flats of your choice and don't forget your party hat!
If you are feeling bold, you can replace your dark skinnies with leopard denim leggings. Meow! Add a pair of high heeled boots or pointed toe pumps and you are ready to celebrate! Pick up your fancy fall leggings here.
What do you wear to a birthday party? Do you dress up or are you more casual?
Happy Birthday, HerKentucky!!
One day, back in August 2011, I was sitting by the pool, trying to make a tight deadline. Instead of focusing on the article I needed to finish, though, I started thinking about my girlfriends. Specifically, I thought of my Kentucky girlfriends. They're an accomplished group of women -- doctors and lawyers and teachers and business women. They balance careers and families and still find time to help others and look good. They hail from every corner of the Commonwealth. And they're not afraid to share their opinions.

Pretty soon, I was emailing a group of friends and acquaintances -- women whom I knew from school, work, and social settings. I asked them all a question that people either love or hate:
"What if we started a blog that tells our stories?"
As we began brainstorming ways to tell our experiences with the Bluegrass State, I had only one request: Everything can't be "lovely"; in fact, that kind of preciousness is what we should avoid. Instead, let's tell sincere stories that allow our love for Kentucky to shine through. I knew we were in for an interesting ride as we started discussing design. As we talked about possible headers, the suggestion of an equestrian motif came up. Sarah quickly noted that horses and equestrian life are really only a Bluegrass region thing; they don't symbolize every corner of the state. It was the first of many times that a HerKentucky writer reminded me that there isn't one unique Kentucky experience.
Over the past two years, the HerKentucky writers have used this site to provide interesting insights into their own Kentucky experiences. We've heard of small-town restaurants and festivals as well as life in Kentucky's biggest cities. We've talked sports, colleges, and current events. We've picked up new writers, while others have gone on to other opportunities. And we've created a site that makes me very, very proud.
I feel fortunate to count the HerKentucky writing team among my dearest friends. The hard work they've put into the site can be seen in every post, and the stories they share are simply priceless. I am so glad that I put off writing an article two years ago; it made the deadline tough, but it was one of the best decisions I ever made.
Happy 2nd Birthday, HerKentucky! Thanks to all of our writers and friends who have encouraged the site. Most of all, thanks to all of our readers who've stuck around to hear our Kentucky stories!
HerKentucky Turns 2!
Today's our birthday, y'all!

Today marks two years of the HerKentucky blog. Every member of our writing staff is so thrilled and humbled that y'all stop by to read our posts and visit our social media sites. It's so wonderful to know that y'all love the Commonwealth as much as we do!
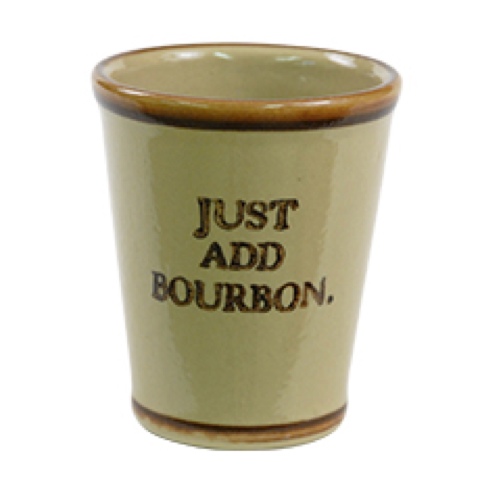
I wish we could all sit down together for a glass of bourbon and a cupcake today. Since that's a little difficult to manage, we've partnered with Louisville Stoneware to bring one lucky HerKentucky reader a stylish way to enjoy her favorite drink.
The Louisvilke Stoneware Mint Julep Cup is so fun, and its logo gets straight to the point.
Here's what our friends at Louisville Stoneware would like you to know about this item:
Located in the heart of Bourbon Country, and with a history of making whiskey jugs, it’s only natural for Louisville Stoneware to have a line of Julep Cups.The exact origins of the Mint Julep are unknown, but it is said to have originated in the southern United States during the eighteenth century. U.S. Senator Henry Clay of Kentucky introduced the drink to Washington, D.C., at the Round Robin Bar in the famous Willard Hotel. It was also the favorite drink of American author William Faulkner. The Mint Julep is best known as the official drink of the Kentucky Derby, a position it has held since 1938, with Churchill Downs making over 120,000 for Derby fans each year.Chill your Stoneware Julep Cup in the freezer for at least 30 minutes – it can be stored there permanently if you like. With a slightly flared rim, this cup is perfect for slow sipping – the only way a julep should be enjoyed. For an authentic Julep-sipping experience, we suggest following the recipe on our Julep pitcher. Cheers!Your stoneware can be safely used in the oven, microwave, dishwasher and freezer. Just remember to allow pieces from the dishwasher to cool before refrigerating. Likewise, you should allow refrigerated piece to return to room temperature before washing. As with any stoneware item, extreme and sudden variation in temperature may cause cracking or breakage.
You can enter to win using the Rafflecopter widget. The winner will be announced on Monday, September 16th, and you can look forward to more HerKentucky birthday fun throughout September!
a Rafflecopter giveaway
a Rafflecopter giveaway
Thanks so much to Louisville Stoneware for partnering with HerKentucky to bring y'all this giveaway. No member of the HerKentucky writing staff was compensated in any way for this post. Check back throughout September for more celebrations, giveways, and fun!
Photo Fanatic: Celebrations Frozen in Time
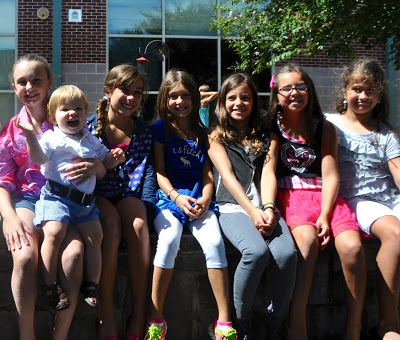
A couple of years ago, I went to a blogging conference where I encountered the Smilebooth. The event of the night was a party celebrating the release of The Lorax. There was so much happy commotion coming from one side of the room, so my friend Holli and I checked it out.
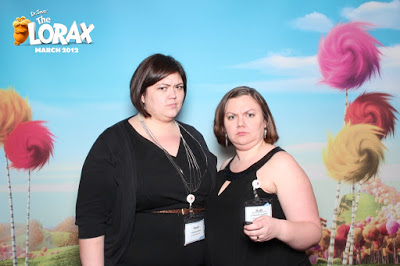
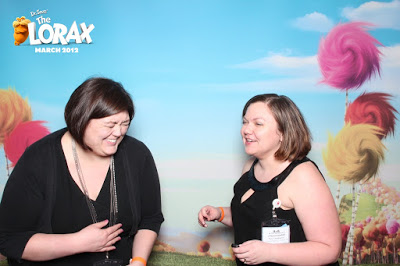
It's a photo booth, but taken to the nth degree of fancy. You stand in front of the fun backdrop and see yourself on a big screen. You get a remote control, and snap away. As you're snapping, the images all went to an iPad where you could peruse them when you were done. From there, you could email it, Tweet it, or Facebook it. Boom. Instant gratification and really fun photos.
When it comes down to it, photos are the way we tend to remember our lives. For special events or just well-planned soirees, I'm a fan of hiring a photographer. Obviously for most events, the Smilebooth is cost prohibitive, though I found a few Kentucky events that had the Smilebooth. Here are the things needed to set up your own photobooth:
Have you ever set up a photo booth for an event? How did you do it?
When it comes down to it, photos are the way we tend to remember our lives. For special events or just well-planned soirees, I'm a fan of hiring a photographer. Obviously for most events, the Smilebooth is cost prohibitive, though I found a few Kentucky events that had the Smilebooth. Here are the things needed to set up your own photobooth:
- Camera: Obviously you need to capture the photos, so set up a camera at the appropriate height and for the width of the background. Having a remote shutter release is great if you don't have someone on hand to snap all the pics. If you have a fancy schmancy camera that can connect to a TV, you can connect it for people to preview their photos when they're taken.
- Backdrop: Fun, festive backdrops are awesome. Make one by securing holiday garland or streamers to a wall or drop cloth and hanging. Or you can purchase backdrops from Etsy if there's something you're really going for. I love the backdrops that have texture to them. Here's an easy tutorial for a backdrop made of plastic table cloths.
- Props: This is where things get fun. Make or buy props. Funny hats, stick moustaches, balloons, feather boas, picture frames, and more. Lots of Etsy sellers have great prop packs.
- A gallery: You want your friends to be able to access and share the photos, so upload them to a gallery after the event. You could use Flickr, Picasa, Smugmug, or even just Facebook.
Have you ever set up a photo booth for an event? How did you do it?
Homemade Birthday Cakes (It's easier than you think!)
I'm pretty into birthdays. I start thinking of themes and decorations sort of ridiculously far in advance, and create a new Pinterest board every time I get an idea for a possibly party theme.
And usually, the idea starts with the cake. It's the centerpiece. I always have to decide on the cake first, and then everything else falls into place.
I admit, I make a big deal of the cake. It's what I spend the most time on, and it generally takes some overnight prep plus some time the following morning on the day of the party to finish. In case any of you have thought about doing your own homemade cakes but have no idea where to start, or think it's entirely too difficult, I thought I'd throw out a few tips I've learned along the way.
1. I use Cake Central and Pinterest to get ideas for cakes. Quick searches on either of these sites will turn up hundreds of different cake ideas.
2. Never use store-bought frosting to decorate cakes. It's not stiff enough and it won't hold its shape. I use Wilton's buttercream icing recipe, and add whatever coloring I want.
3. You will ALWAYS need more icing than you think. It takes me at least two batches to cover a cake. (Thank goodness the recipe is super easy to throw together.)
4. Invest in Viva paper towels. When you're finished frosting your cake, lay the paper towel over the icing and rub your hands over it. I never cover a cake in fondant--I think you have to be very talented to pull that off. This Viva method will give the icing a smooth, polished look without the fondant. (Other brands of paper towels WON'T work. They'll just stick to the icing. Don't bother trying. I made the mistake so you won't have to.)
5. I DO use fondant a lot to add little accents. I always use the store-bought kind. It tastes awful, but I just warn everyone not to eat it. I use a roller to flatten the fondant out (thin enough so it will harden quickly) then cut out whatever shapes I want. I usually do this the night before so the next day they will be hard enough to stick to the cake.
6. Be creative. When you see a cake you want to try to copy, you don't necessarily have to use all the same products and ingredients a professional would use. (I'll show you some substitutions I've made in the pictures below!)
The cakes are definitely time-consuming, but they're not difficult. If you like this sort of thing, it can be fun to find a cake you like and figure out an easy way to make it yourself. Below are some cakes I've made over the years, and quick explanations of how I put them together! Good luck! Feel free to leave questions in the comments!
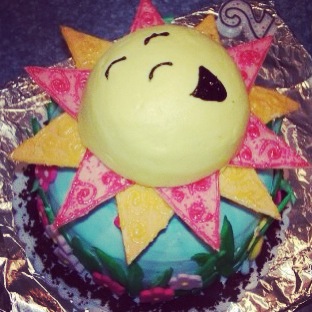 You Are My Sunshine
Three 9-in round cakes make the bottom layer and two six-in round cakes for the middle layer. The sun was made using one of those "ball" cake pans you can find at Michaels.
Those sunbeams? The original called for triangles made from royal icing. I tried and failed. I cut a tortilla into triangles and baked them, then covered them with sugar and store-bought gel icing.
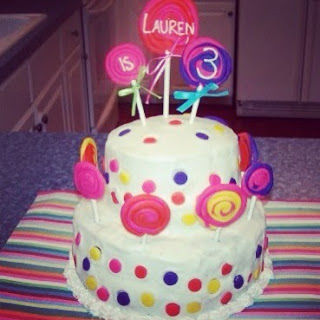 Candy Shop
The cake itself is the same as the sun, with two 6-in and two 9-in cakes making up the layers.
Flatten the fondant and cut it into strips, then roll them between your fingers to create long rounded pieces. Shape those into spirals for the lollipops, then stick lollipop sticks in them.
*The lollipops were REALLY heavy. To make them stay upright, I cut straws in half and slid them down into the cake, then slid the lollipops in the straws.
Stack two 9x13 cakes for the bottom layer. Cut another 9x13 cake in half and stack the halves for the middle layer. The top layer is a triangle cut from another 9x13 cake. (I MAY have eaten the rest of that cake while I iced this one. Maybe. Probably.)
The rest of the decorations are made from buttercream icing using a cake decorating tube set (similar to this).
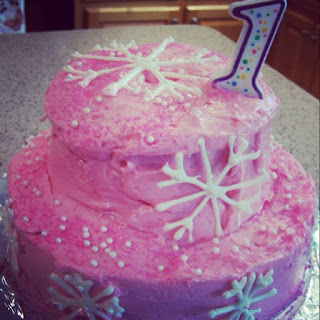 Snowflake
This cake was super simple, because it's just the same basic cake as the Sunshine and Lollipop cakes. I made the snowflakes out of white chocolate. Melt the chocolate and pipe it onto wax paper in whatever shape you want, then let it dry. Stick it to the cake using icing as glue!
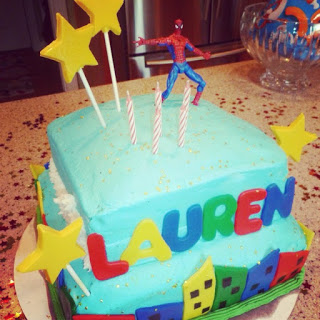 Superhero Party
Aside from my usual fondant accents, I branched out with this one and made star lollipops using a candy mold I found at Hobby Lobby. I'd always avoided candy molds because it just sounded like too much to get into, but this was ridiculously easy.
Melt the candy pieces (they sell them right next to the molds). Pour the melted candy into the mold. Add the lollipop sticks. Go eat spoonfuls of buttercream icing and marvel at your own brilliance while you wait for them to harden. (This would've been SO MUCH EASIER for that lollipop cake than the super heavy fondant.)
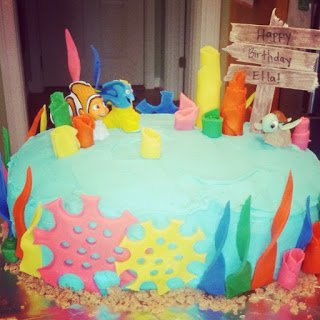 Finding Nemo
This was the easiest cake I've made yet. Stack two 9x13 cakes on top of each other, then cut off the corners to create an oval shape.
I bent craft sticks until they broke to give the jagged edges of the sign, and glued all that together. The "sand" around the bottom is brown sugar. All the decorations are made from fondant, aside from the figurines, which I found on Amazon.
And usually, the idea starts with the cake. It's the centerpiece. I always have to decide on the cake first, and then everything else falls into place.
I admit, I make a big deal of the cake. It's what I spend the most time on, and it generally takes some overnight prep plus some time the following morning on the day of the party to finish. In case any of you have thought about doing your own homemade cakes but have no idea where to start, or think it's entirely too difficult, I thought I'd throw out a few tips I've learned along the way.
1. I use Cake Central and Pinterest to get ideas for cakes. Quick searches on either of these sites will turn up hundreds of different cake ideas.
2. Never use store-bought frosting to decorate cakes. It's not stiff enough and it won't hold its shape. I use Wilton's buttercream icing recipe, and add whatever coloring I want.
3. You will ALWAYS need more icing than you think. It takes me at least two batches to cover a cake. (Thank goodness the recipe is super easy to throw together.)
4. Invest in Viva paper towels. When you're finished frosting your cake, lay the paper towel over the icing and rub your hands over it. I never cover a cake in fondant--I think you have to be very talented to pull that off. This Viva method will give the icing a smooth, polished look without the fondant. (Other brands of paper towels WON'T work. They'll just stick to the icing. Don't bother trying. I made the mistake so you won't have to.)
5. I DO use fondant a lot to add little accents. I always use the store-bought kind. It tastes awful, but I just warn everyone not to eat it. I use a roller to flatten the fondant out (thin enough so it will harden quickly) then cut out whatever shapes I want. I usually do this the night before so the next day they will be hard enough to stick to the cake.
6. Be creative. When you see a cake you want to try to copy, you don't necessarily have to use all the same products and ingredients a professional would use. (I'll show you some substitutions I've made in the pictures below!)
The cakes are definitely time-consuming, but they're not difficult. If you like this sort of thing, it can be fun to find a cake you like and figure out an easy way to make it yourself. Below are some cakes I've made over the years, and quick explanations of how I put them together! Good luck! Feel free to leave questions in the comments!
Three 9-in round cakes make the bottom layer and two six-in round cakes for the middle layer. The sun was made using one of those "ball" cake pans you can find at Michaels.
Those sunbeams? The original called for triangles made from royal icing. I tried and failed. I cut a tortilla into triangles and baked them, then covered them with sugar and store-bought gel icing.
The cake itself is the same as the sun, with two 6-in and two 9-in cakes making up the layers.
Flatten the fondant and cut it into strips, then roll them between your fingers to create long rounded pieces. Shape those into spirals for the lollipops, then stick lollipop sticks in them.
*The lollipops were REALLY heavy. To make them stay upright, I cut straws in half and slid them down into the cake, then slid the lollipops in the straws.
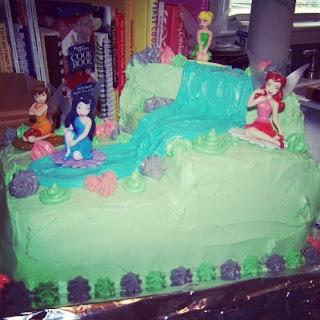
Fairies
I found the fairy figurines a Disney fairy cake kit on Amazon. See the cake in the advertisement? I decided to recreate it.
Stack two 9x13 cakes for the bottom layer. Cut another 9x13 cake in half and stack the halves for the middle layer. The top layer is a triangle cut from another 9x13 cake. (I MAY have eaten the rest of that cake while I iced this one. Maybe. Probably.)
The rest of the decorations are made from buttercream icing using a cake decorating tube set (similar to this).
This cake was super simple, because it's just the same basic cake as the Sunshine and Lollipop cakes. I made the snowflakes out of white chocolate. Melt the chocolate and pipe it onto wax paper in whatever shape you want, then let it dry. Stick it to the cake using icing as glue!
Aside from my usual fondant accents, I branched out with this one and made star lollipops using a candy mold I found at Hobby Lobby. I'd always avoided candy molds because it just sounded like too much to get into, but this was ridiculously easy.
Melt the candy pieces (they sell them right next to the molds). Pour the melted candy into the mold. Add the lollipop sticks. Go eat spoonfuls of buttercream icing and marvel at your own brilliance while you wait for them to harden. (This would've been SO MUCH EASIER for that lollipop cake than the super heavy fondant.)
This was the easiest cake I've made yet. Stack two 9x13 cakes on top of each other, then cut off the corners to create an oval shape.
I bent craft sticks until they broke to give the jagged edges of the sign, and glued all that together. The "sand" around the bottom is brown sugar. All the decorations are made from fondant, aside from the figurines, which I found on Amazon.
Celebrating Ten Years of Marriage
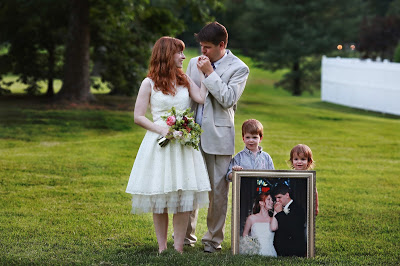
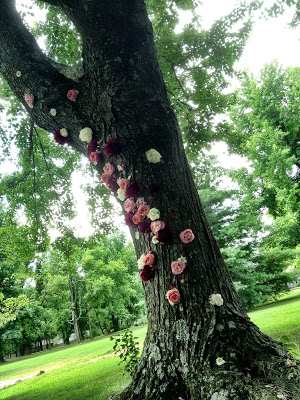
At 7pm, we walked out our front door with our two boys serenaded by my dear friend James Michael Bake rand stood beneath this beautiful tree crafted by Sara Falder of Flower + Furbish and said vows we'd written for one another.
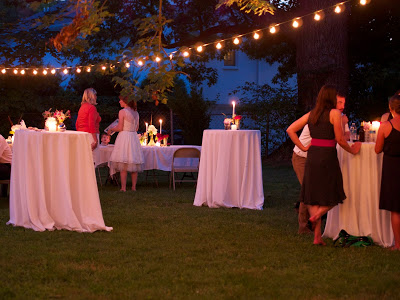
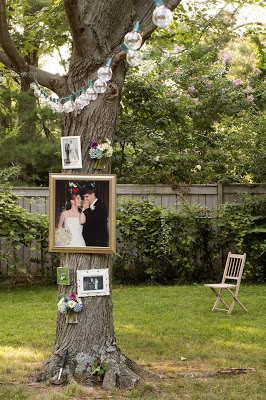
Then we went to the backyard and ate pie and drank bourbon and danced under ANOTHER fantastic tree covered with photos of our own family's famous love stories.
In terms of celebrating life's big events, we couldn't have asked for a more perfect evening.
~ Sarah Stewart Holland